目次
そもそもJavaとは?
Javaって?公式に聞け!
Javaって下火なの?
破竹の勢いのPythonに比べると話題性に欠けるが、
まだまだイケてる感じなの?
これは2020年のGithubでのランキングになります。
2019年にPythonに2位を明け渡してはいますが、未だ3位に位置しています。
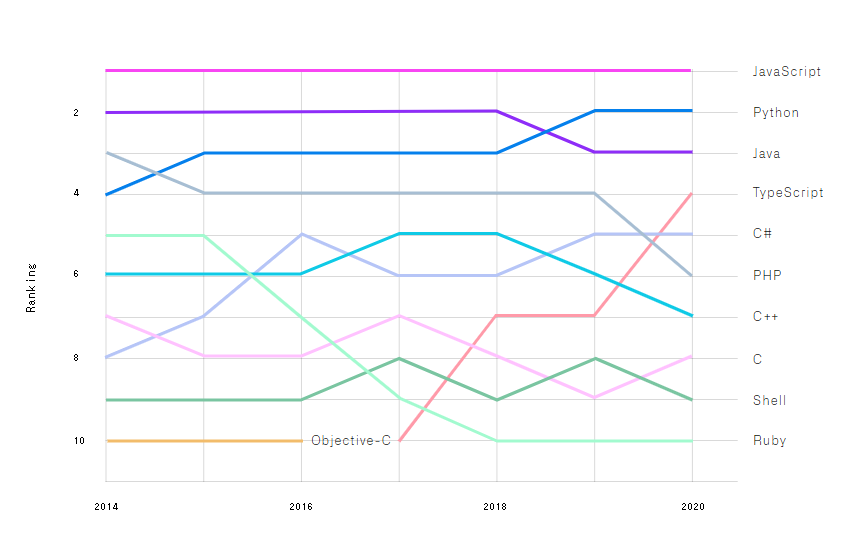
Google Trendsで見てみるとPythonには負けてるが、まだまだ使われてそう。

ちなみに下記記事にランキングと学んでみるべきプログラミング言語をまとめています。
ご参考までに!
このお話の大前提のお話
あなたのPCなんですか?
ここの記事で紹介するのは下記の場合です
- Window10(Pro)※Homeとかでも多分OK
こんな環境になります
ここの方法を実践するとどんな環境ができるの?
今回はこんな環境になります
- Visual Studio Code
- AdoptOpenJDK 11
OracleのJavaを使うとどうしても有償のお話が出てきちゃうのでね。
AdoptOpenJDKはRed Hat、IBM、Microsoft、AWSなどがスポンサーとなっています。
有償だとちょっと困っちゃうこともあるしね…。
必要なものをダウンロードする
インターネット環境がない人は?いませんね!
これらをダウンロードしておきます
いずれもWindows10向けのものをダウンロードします。ここでダウンロードされたのは私の場合は以下になりました。
- VSCodeUserSetup-x64-1.52.1.exe
- OpenJDK11U-jdk_x64_windows_hotspot_11.0.9.1_1.msi
赤字の部分はダウンロードするタイミングによって変わる可能性があります。あまりにも数字が違い過ぎるとちょっとこれから紹介する記事は参考にならない可能性があります。
インストール方法!
ここからはマウスを右手に添えるだけ…
まずは実行環境!Javaインストール!
- msiファイル(インストーラー)をダブルクリック

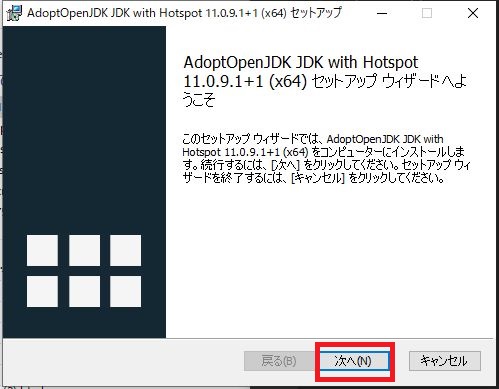
- 次へをクリックします。
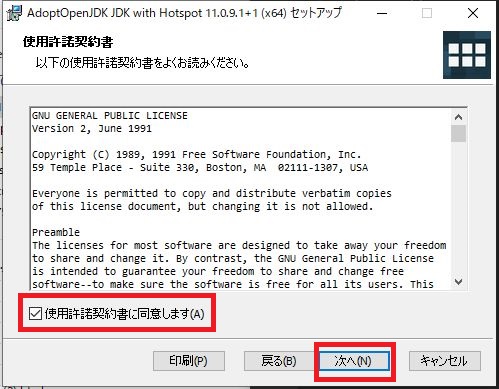
- 同意部分にチェックを入れて、次へをクリックします。
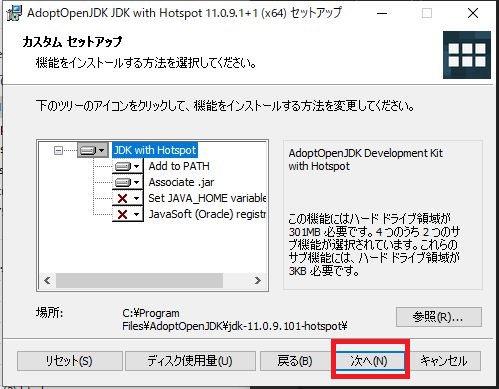
- 基本そのままで良いです。インストール先などの設定です。次へをクリックします。
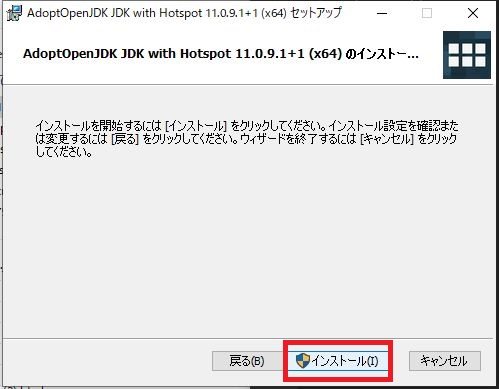
- インストールをクリックします。
- 暫し待ちます。

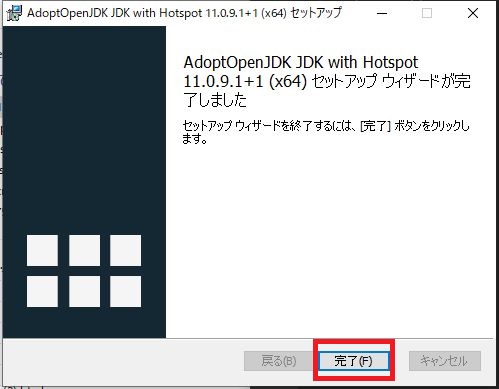
- 以上でインストールが完了です。完了をクリックします。次の手順でインストールされているかを確認します。
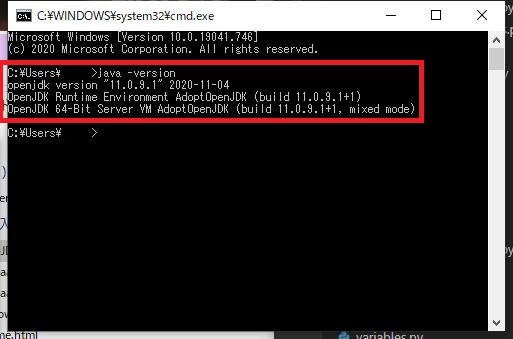
- Windowsロゴ+Rを同時に押して、cmdと入力し、Enterを押します。(コマンドプロンプトが起動します。)起動した後はjava -versionと入力して、Enterを押して、openjdk version x.x.x.xとかって表示されればOKです。
- もし表示されなかった場合はJava.exeのあるフォルダにPathが追加されていない場合があります。多分大体C:\Program Files\AdoptOpenJDK\jdk-11.0.9.101-hotspot\binにインストールされているはず…です。調べてみてください。
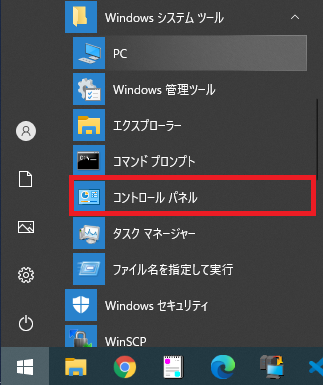
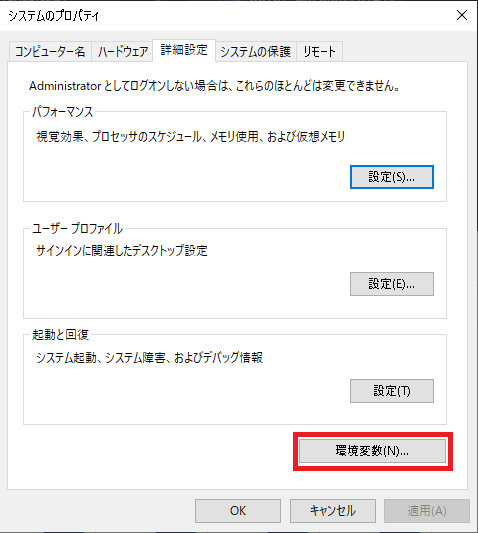
- Windowsロゴをクリックして、コントロールパネルを開きます。
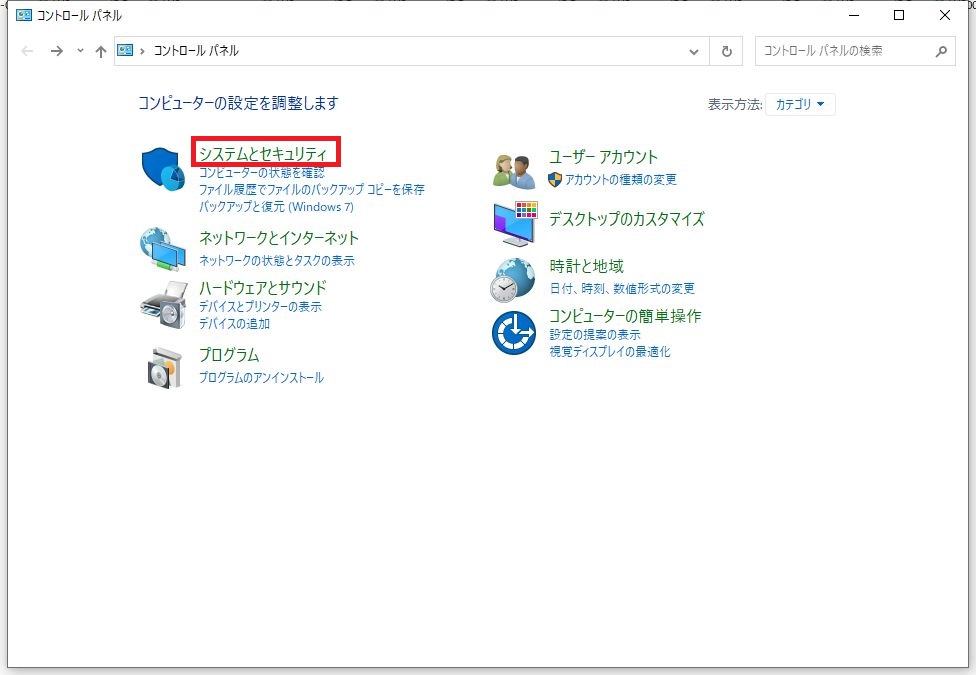
- システムとセキュリティをクリックします。
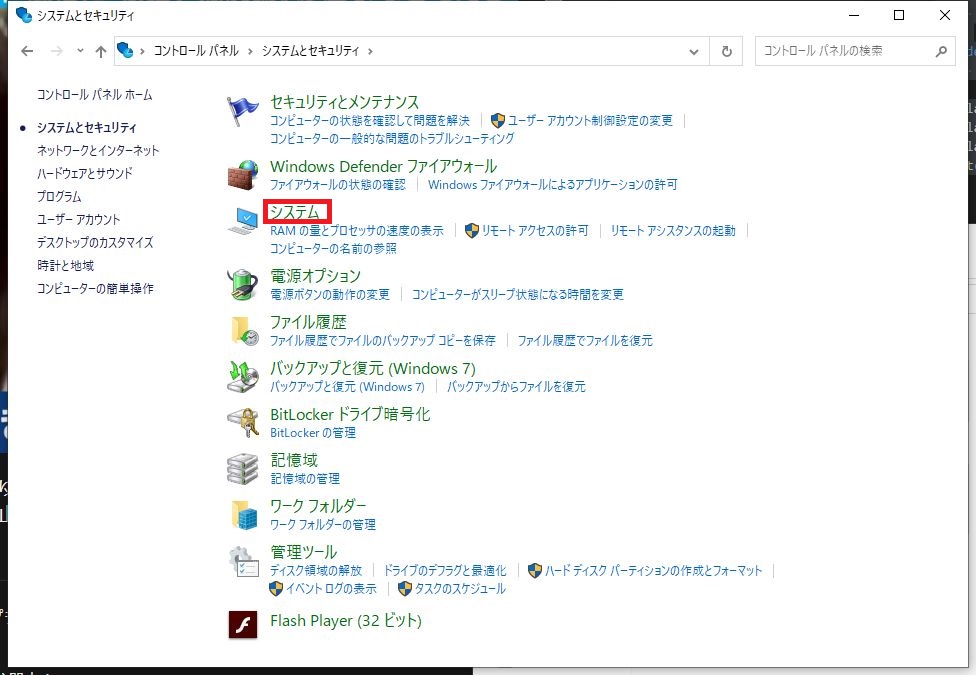
- システムをクリックします。
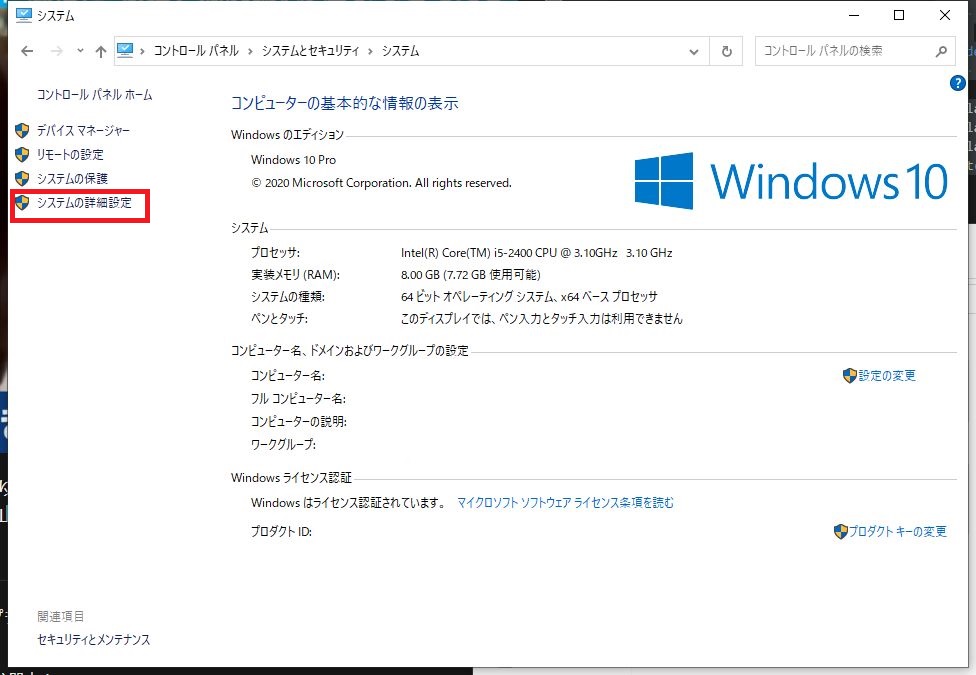
- システムの詳細設定をクリックします。
- 環境変数をクリックします。
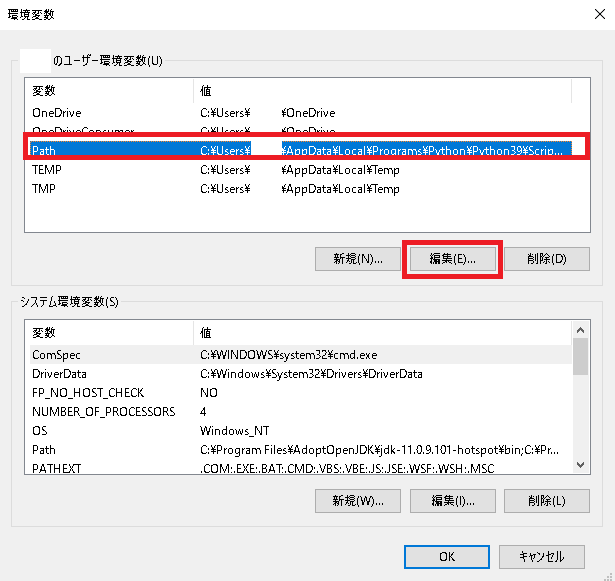
- Pathをクリックし、編集をクリックします。
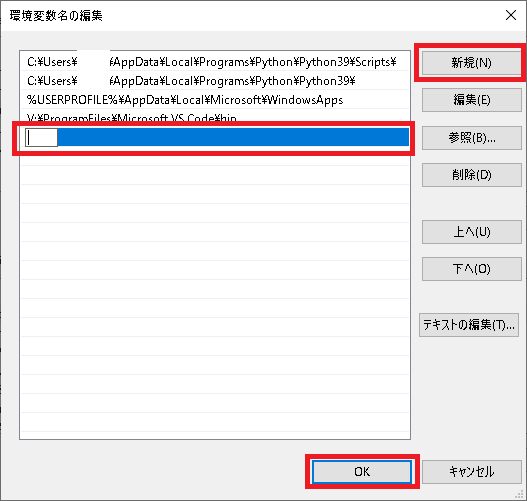
- 新規をクリックし、入力欄に前項で調べたPathを入力します。OKをクリックします。この状態で再度コマンドプロンプトを開きなおして、同じコマンドを入力します。
Visual Studio Codeのインストール!
- exeファイルをダブルクリックします。

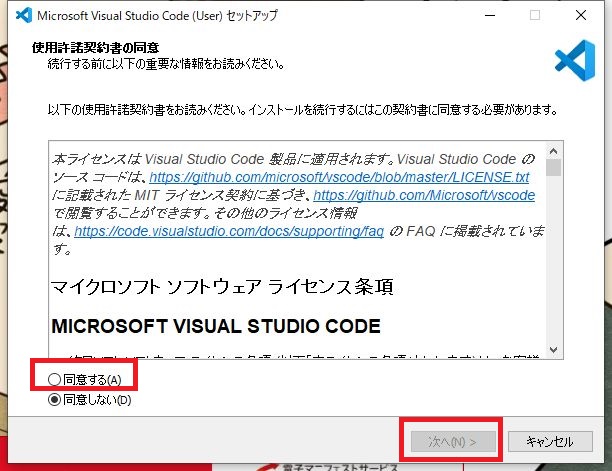
- 使用許諾に同意するにチェックを入れて、次へをクリックします。
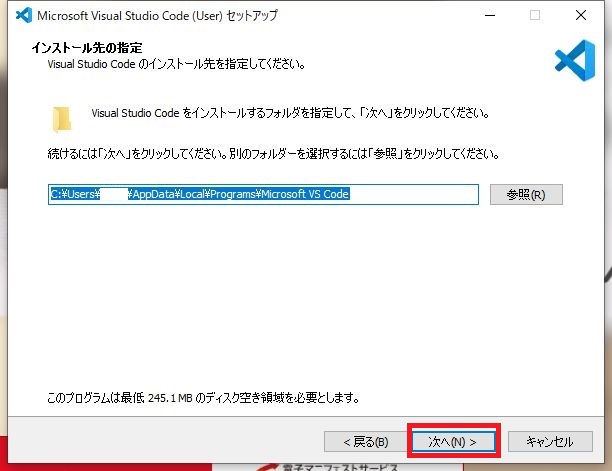
- インストールする場所を選びます。気にしない人はそのままでも良いです。次へをクリックします。
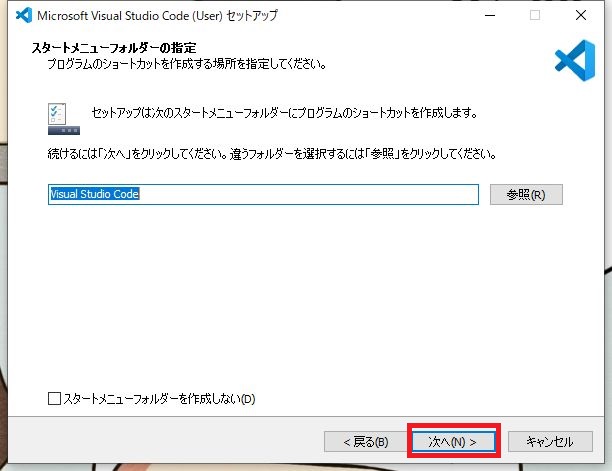
- ここはでそのままでも良いです。次へをクリックします。
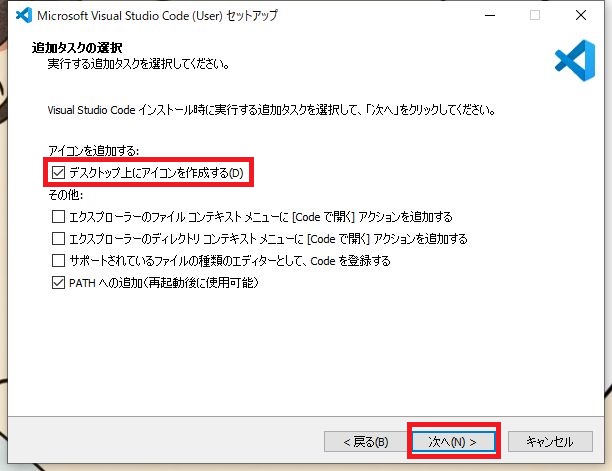
- デスクトップ上にアイコンを作成したい場合はチェックを入れます。それ以外はそのまでも良いです。次へをクリックします。
- 最後の確認画面です。問題なければインストールをクリックします。以下画像だとインストール先を少し変えてますが気にしないでください。

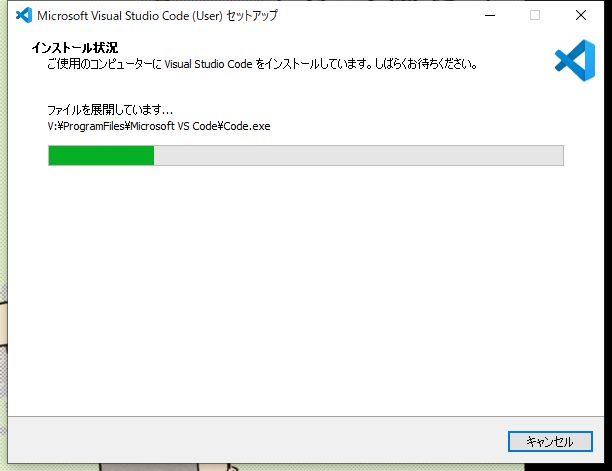
- 暫く待ちます。
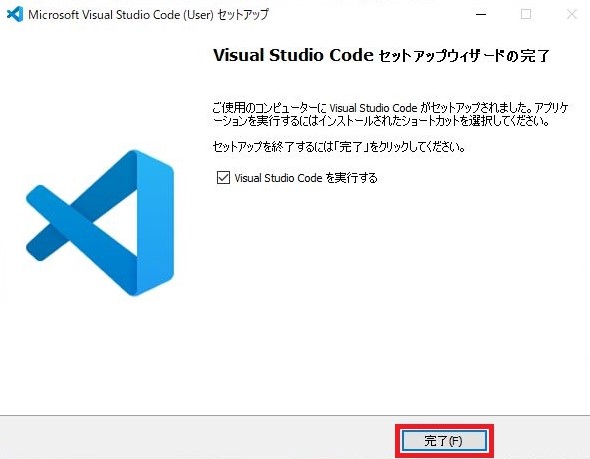
- インストールが完了するとこんな画面が表示されます。完了をクリックします。
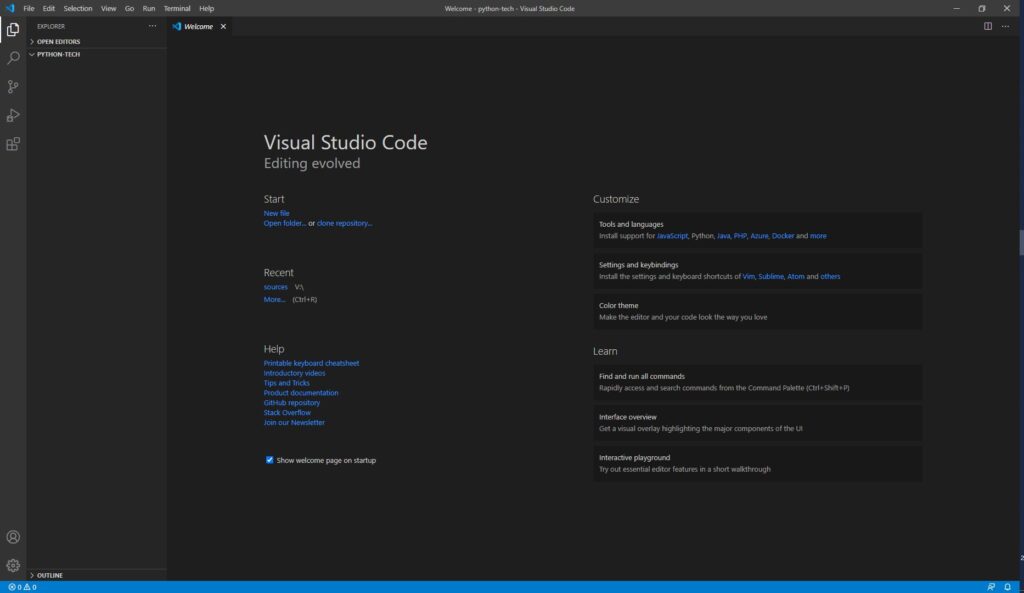
- 起動するとこんな画面が表示されます。次にTerminal起動時にコマンドプロンプトになるように設定を変更します。
Visual Studio CodeのTerminalをPowerShellからコマンドプロンプトに変更!
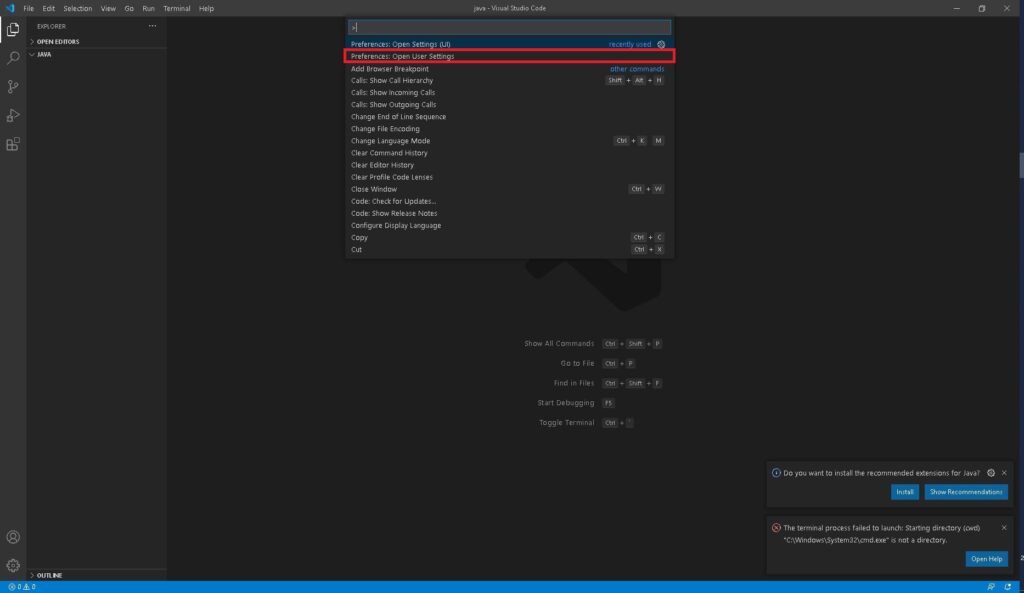
- Ctrl + Shift + pを押して、settingと入力します。その中に表示されるPreferences: Open User Settingsを選択します。
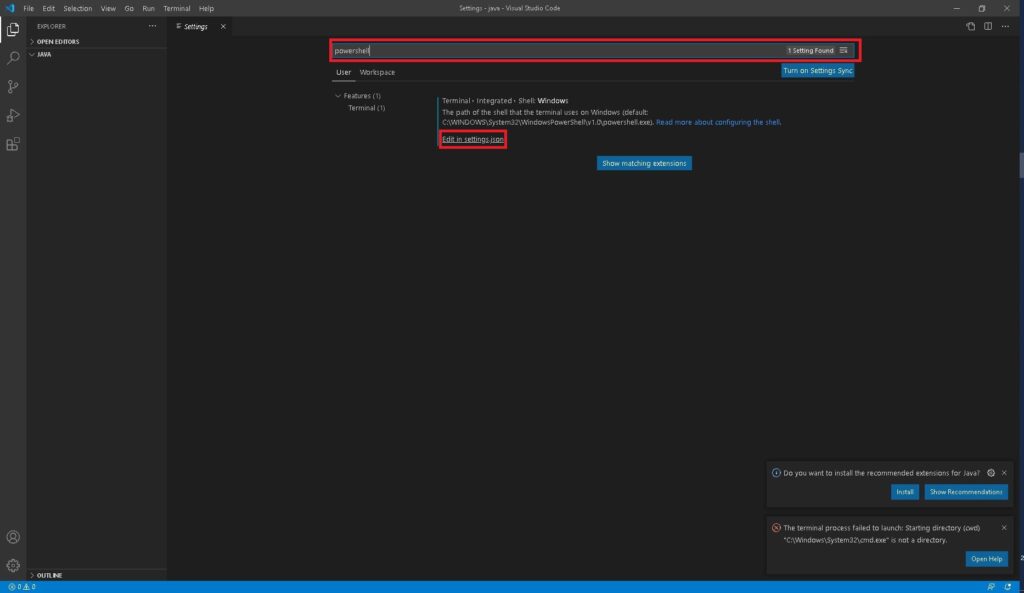
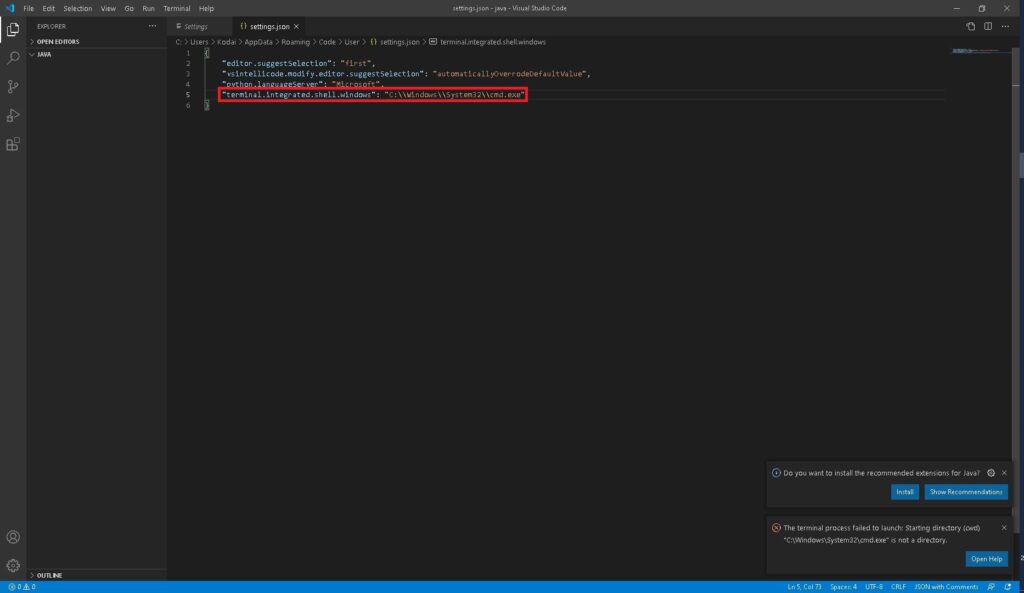
- PowerShellと入力して、Terminal > Integrated > Shell: Windowsにある、Edit in settings.jsonをクリックします。
- "terminal.integrated.shell.windows"の部分にコマンドプロンプトのPath(C:\\Windows\\System32\\cmd.exe)を入力して閉じます。
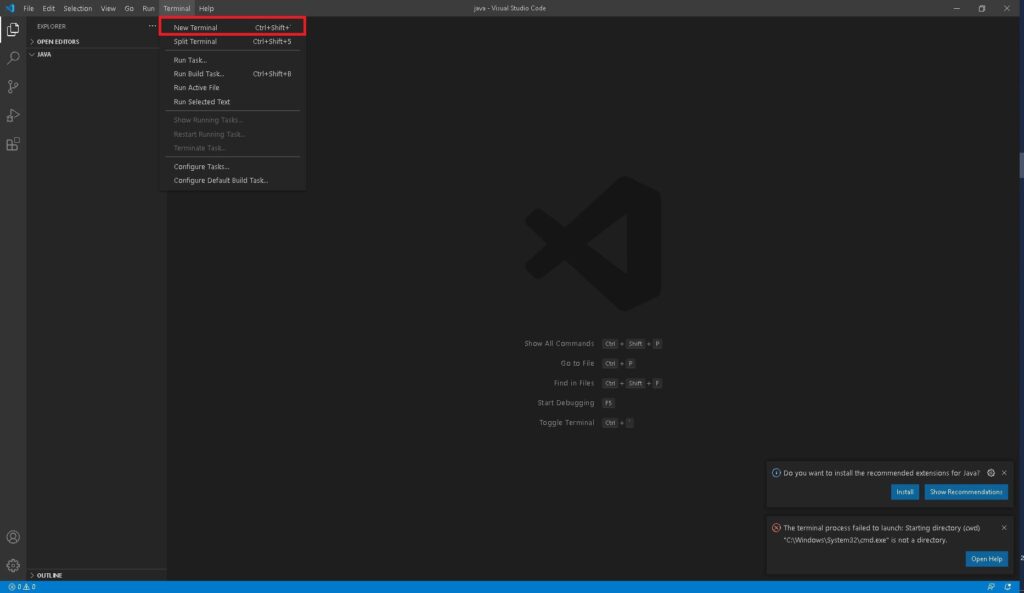
- TerminalからNew Terminalを押すと、画面下にコマンドプロンプトが開きます。
とりあえず実行する!
比較的一瞬です。
画面に何か表示する
- FileをクリックしてOpen Folderをクリックします。
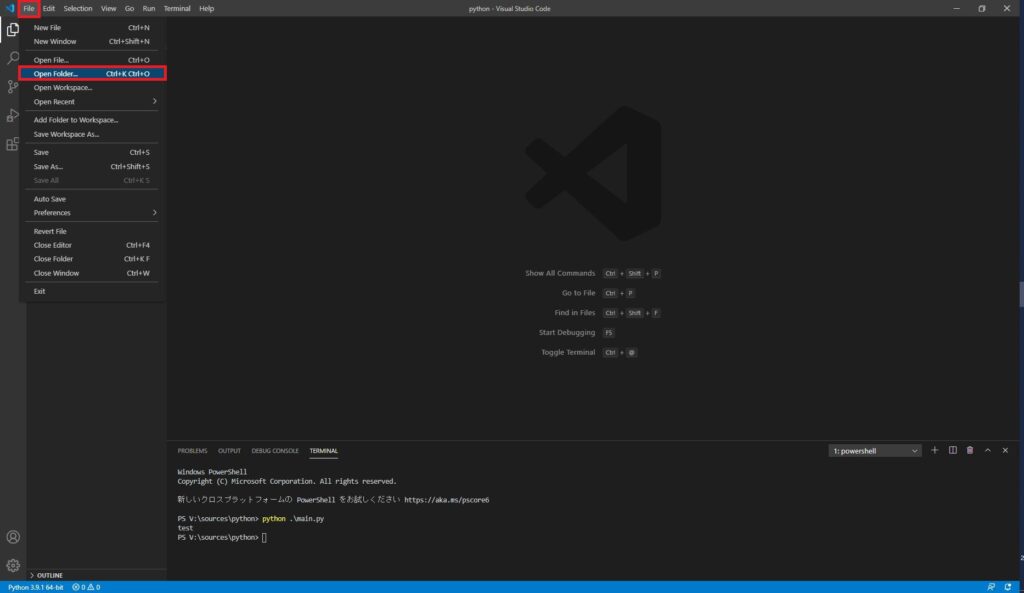
- ソースコードを保管する場所を選択します。場所はどこでも良いです。選択したら、フォルダーの選択をクリックします。

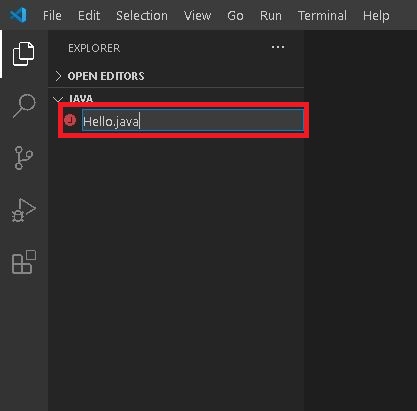
- 左側のフォルダー部分のファイル追加アイコンをクリックします。
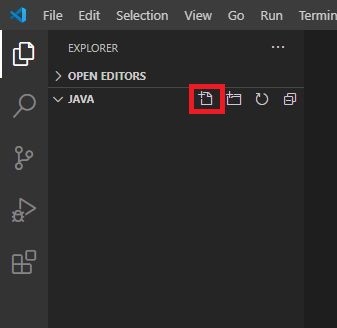
- ファイル名にHello.javaと入力します。
- ファイルが作成され自由に中央部分に文字を入力することが可能です。次からいよいよプログラミング!ここではとりあえず文字をコマンドプロンプト上に表示するアプリを作ってみます。
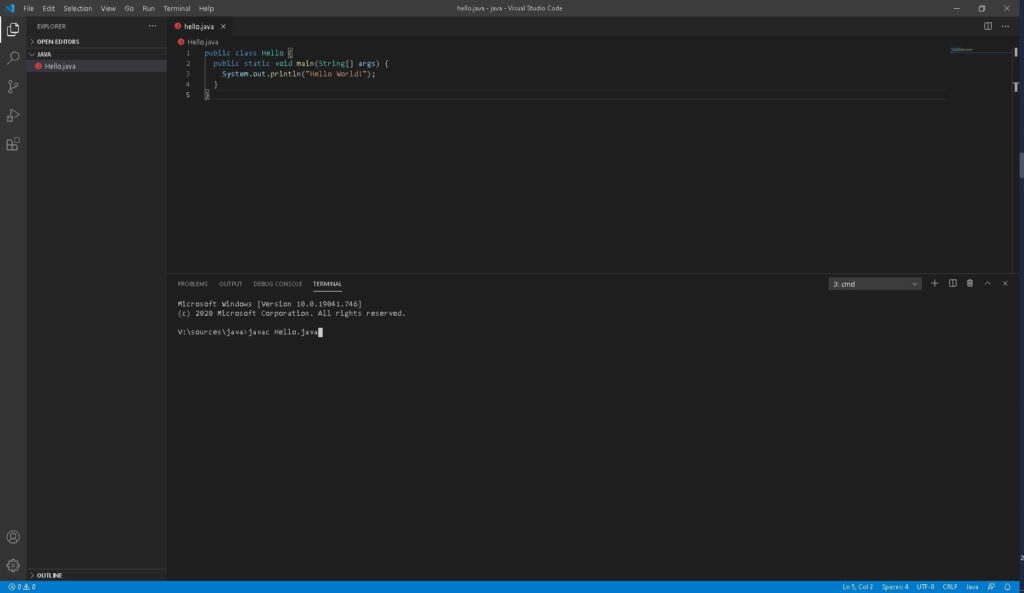
- 文字が入力できる箇所に下記を入力してみましょう。入力が出来たらCtrl+sでファイルを保存します。
public class Hello {
  public static void main(String[] args) {
    System.out.println("Hello World!");
  }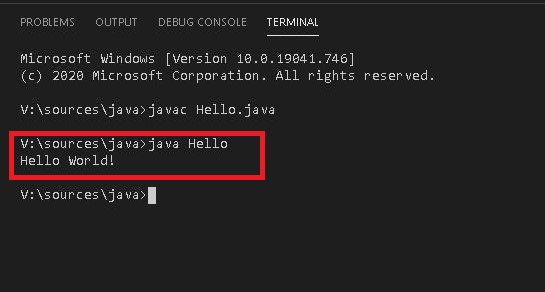
}- コマンドプロンプト部分にjavac Hello.javaと入力して、Enterを押します。
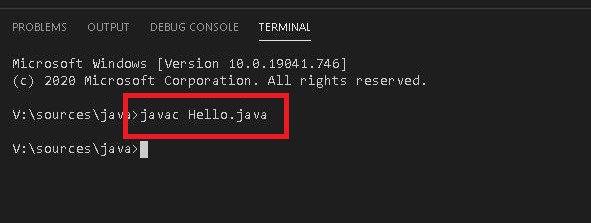
- エラーが発生しなかった場合は次にjava Helloと入力して、Enterを押します。無事にコマンドプロンプト上にHello World!と表示されました。